How to Auto-Start Vov Sticky Notes
 Last updated 6 years ago

Rated 3.0 / 5 (6 reviews) It is a good idea to let Windows automatically start Vov Sticky Notes whenever you open your computer.
- Close Vov Sticky Notes if it is running.
- Run Vov Sticky Notes setup.
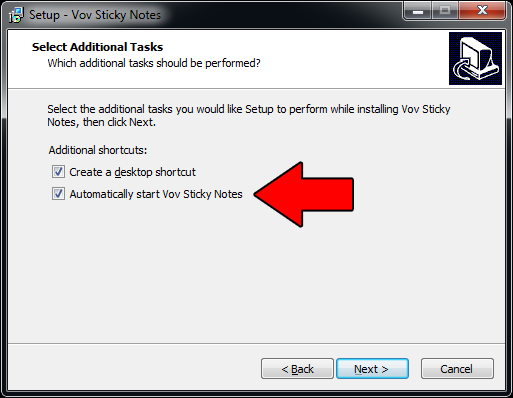
- Continue to "Select Additional Tasks" section.
- Make sure "Automatically start Vov Sticky Notes" checkbox is checked.
- Finish the installation.
After these steps, Vov Sticky Notes should be auto-started every time you login to your computer.
 Vov Sticky Notes
Continue Reading


