
 Last updated 6 months ago

While working within the Windows operating system, you may occasionally encounter the "Run as administrator" option. But what exactly does it mean, and when should you use it? In this post, we'll explore the concept of "administrator", and its evolution from Windows XP through to Windows 11.
"Run as Administrator" is a feature in Windows that allows users to execute programs with administrative privileges. This means that the application will have more access to the system than it would under a standard user account. Running a program as an administrator is often necessary for tasks that require modifications to system files or settings, which are typically restricted for standard users to prevent accidental system damage.
To run a program as an admin, you simply need to locate the executable file or shortcut. Here's how you can do it:
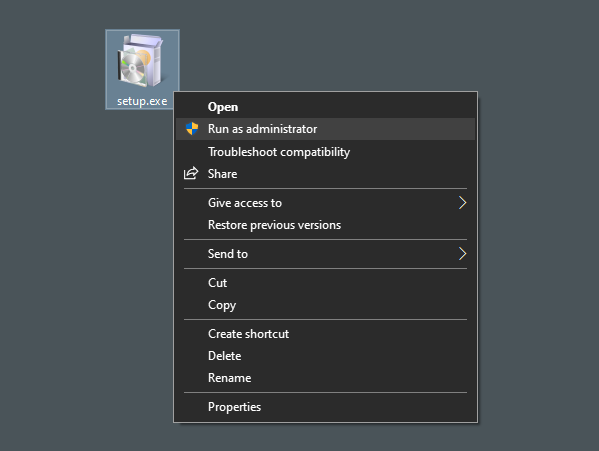
1. Navigate to the file or shortcut you want to run.
2. Right-click on the file or shortcut.
3. From the context menu that appears, click on Run as administrator.
4. If prompted by User Account Control (UAC), click "Yes" to proceed.
This will launch the application with administrative privileges, allowing it to perform tasks that require elevated permissions.
There are several scenarios where running a program as an administrator is necessary:
It's important to note that running programs as an administrator should be done with caution. Only trusted applications should be given such access to prevent potential security risks.
Running software with administrator privileges grants the program higher access to system resources and settings, allowing it to make changes that could affect the entire system. On the other hand, executing software without these elevated privileges confines its access to certain areas and functionalities, preventing it from altering critical system configurations or writing to protected directories. Folders that typically require administrative rights to access or modify include system directories such as:
Software lacking administrator privileges is typically unable to write to the Program Files directory due to restricted access. Instead, these applications traditionally utilize the AppData folder as a viable alternative for storing their data and configurations. This folder serves as a designated space where non-administrative software can safely operate and store necessary information without requiring elevated permissions.
The "AppData" folder is typically located within each user's profile directory in Windows. Specifically, it's found within the "%USERPROFILE%" directory, which is usually on the system drive (often the C: drive) under the following path:
In this path, "Username" refers to the name of the user account currently logged in. The "AppData" folder is a hidden folder by default, containing three subfolders: Local, LocalLow, and Roaming. These folders store application data, settings, and cache specific to each user.
User Account Control (UAC) is a security component that helps prevent unauthorized changes to the operating system. Here's a brief overview of its evolution:
"Run as administrator" is a powerful feature that should be used judiciously to maintain the integrity and security of your Windows system. Understanding when and why to use it is essential for any user who wants to manage their computer effectively. As Windows continues to evolve, we can expect UAC to become even more sophisticated, striking the perfect balance between security and usability.


