Convert Audio and Video to Subtitles Offline with AI
Need to generate subtitles or transcriptions for your videos and audio recordings without uploading sensitive files to cloud servers? Vovsoft Speech to Subtitle Converter makes it effortless.
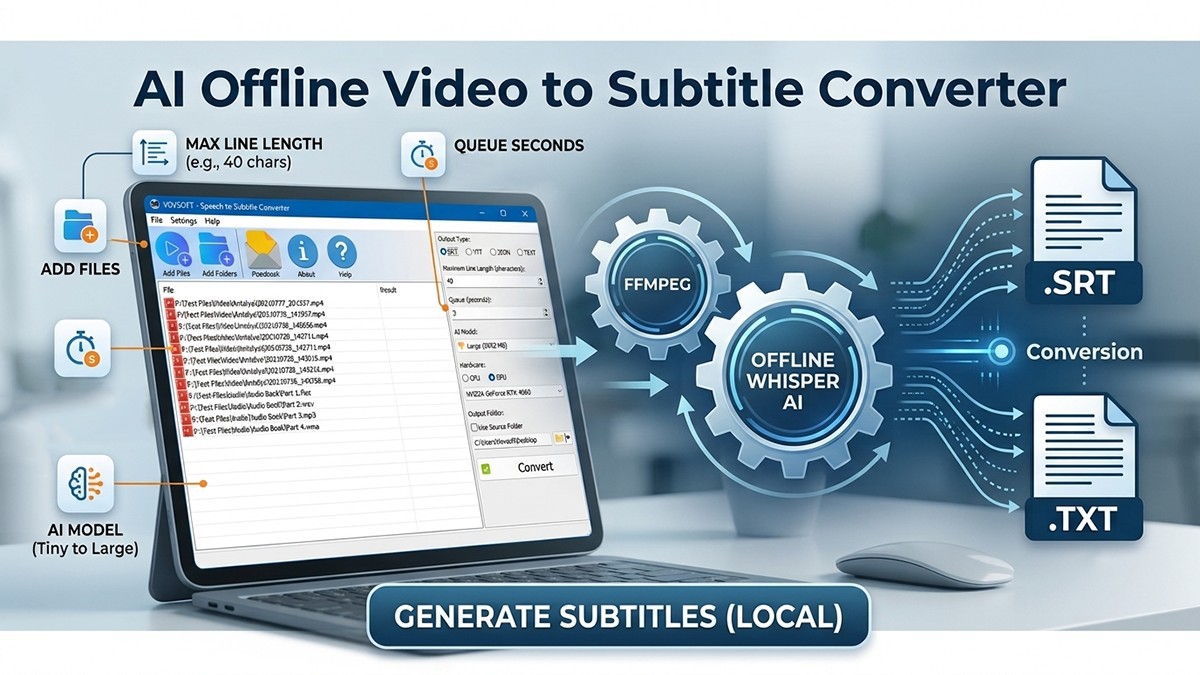
Powered by OpenAI Whisper and FFmpeg, this standalone Windows utility converts spoken audio into accurate subtitles fully offline — giving you complete privacy, and fast local processing.
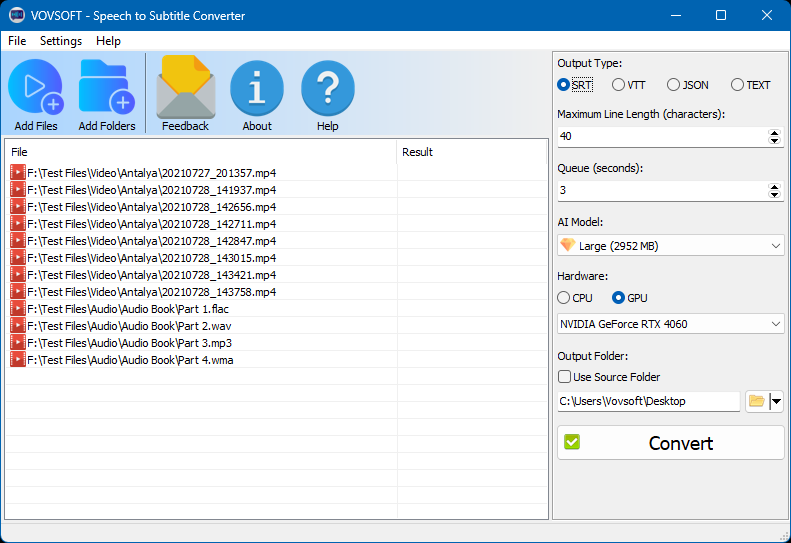
Here is a step-by-step guide to setting up and optimizing your conversions.
Why Use Vovsoft Speech to Subtitle Converter?
- 100% Offline & Private: No API keys required, no external server uploads, and no internet connection needed during processing.
- Batch Processing: Import multiple audio (MP3, WAV, FLAC, WMA) and video (MP4, MKV, AVI) files at once.
- Hardware Acceleration: Choose between CPU or GPU (NVIDIA CUDA) execution to speed up transcriptions.
- Multiple Export Formats: Save output directly as .srt, .vtt, .json, or plain .txt.
Key Settings Explained
To get the best transcription output, it helps to understand how to configure the right-hand options panel:
1. Output Type
- SRT: The standard subtitle file format supported by YouTube, Premiere Pro, VLC, and almost all video players.
- VTT: WebVTT format, ideal for HTML5 web video players.
- JSON: Detailed output containing precise timestamps, text segments, and structural data for developers or custom scripts.
- TEXT: Plain text transcription without any timestamps, perfect for articles, notes, or reading transcripts.
2. Maximum Line Length (characters)
This setting controls how many characters appear on a single line before breaking to a new line.
Standard captions (Default: 40 characters): Keeps text short and readable on screen so viewers can read captions quickly without blocking the video.
Longer lines: Useful if you are exporting to .txt or .json and prefer larger blocks of text rather than short video-style subtitle breaks.
3. Queue (seconds)
The Queue setting defines the time interval (in seconds) used to segment and buffer audio chunks during processing.
Shorter intervals (1–3 seconds): Creates tighter, more frequent subtitle breaks that match fast-paced dialogue or short pauses.
Longer intervals (3+ seconds): Merges spoken phrases into longer continuous sentences, reducing line jumps for slower-paced speech or audiobooks.
4. AI Model
The app utilizes OpenAI's Whisper models locally. Choosing the right model balances speed vs. accuracy:
- Base / Tiny: Extremely fast, uses very little memory, best for clear audio or quick drafts.
- Small / Medium: A great balance of fast processing speed and high accuracy for everyday video content.
- Large: Delivers the highest possible accuracy, handling complex vocabulary, accents, and background noise exceptionally well (requires more system memory/VRAM).
5. Hardware (CPU vs. GPU)
- CPU: Runs on your system processor. Compatible with any Windows PC.
- GPU: Offloads processing to a dedicated graphics card (such as an NVIDIA GeForce GPU). GPU acceleration dramatically speeds up transcription times, making batch conversions much faster.
Step-by-Step Guide: Generating Subtitles
- Add Your Files: Click Add Files or Add Folders to import your audio or video files into the list.
- Configure Settings: Choose your desired Output Type (e.g., SRT), set your Maximum Line Length, and adjust the Queue length.
- Select AI Model & Hardware: Choose your preferred Whisper model size and select CPU or GPU.
- Set Output Destination: Choose an Output Folder or check Use Source Folder to save the generated subtitle files in the same directory as your original media.
- Convert: Click Convert to run the transcription. Your subtitle files will be generated locally in seconds/minutes!

 Last updated 2 months ago






 Speech to Subtitle Converter
